Clay Soil Yard Problems Queen Creek Homeowners Fight Every Year
Standing water that never soaks in, plants that drown instead of dry out, new turf that squishes underfoot. Almost all of it traces back to the dense clay subsoil sitting under a thin cap of builder topsoil. Here is what that soil is doing to your yard and the fix that actually holds.
The complaint sounds the same almost every time: "I water it, it just sits there." Or the opposite — a shrub that was thriving in April is dead by July, roots black and mushy, even though the sprinklers never stopped running. Both problems usually trace back to the same cause, and it is not the plant, the sprinkler timer, or bad luck. It is what's under the first six inches of dirt.
Queen Creek's new-construction boom put a lot of houses on lots where the builder scraped, graded, and capped with a thin layer of topsoil, but never touched the dense clay subsoil underneath. That soil doesn't drain, doesn't let roots breathe, and doesn't behave like the loose desert dirt most people picture when they think "Arizona yard." This guide covers what that clay is actually doing to your yard, how to tell it apart from the caliche hardpan everyone in the East Valley already knows about, and the fix that holds up instead of needing to be redone every couple of years.
Why Queen Creek Yards Fight You: The Clay Layer Under the Surface
Much of Queen Creek sits over old alluvial and lakebed deposits, which is a fancy way of saying the ground here was laid down slowly by water over thousands of years, sorting itself into layers of sand, silt, and heavy clay. Builders grading a new subdivision typically strip and rough-grade the native surface, sometimes bring in a few inches of fill or topsoil for the lawn areas, and move on to the next lot. The clay subsoil a foot or so down never goes anywhere. It's just waiting under a layer of dirt that looks fine the day you move in.
Clay is a physically different material from the sandy loam most desert landscaping assumes you're working with. The individual particles are microscopic and pack together tightly, which leaves almost no pore space for water or air to move through. When it's dry, that same tight packing means the soil pulls together and cracks into hard clumps. When it's wet, it swells and turns into something closer to modeling clay than dirt — sticky, heavy, and nearly impossible to work with a shovel. That swing between shrinking and swelling, not just the drainage problem, is what causes most of the damage homeowners actually notice.
This is a different issue from caliche, the calcium-carbonate hardpan layer we cover in our caliche landscaping guide for the East Valley, though the two frequently show up on the same lot. Caliche is a rock-hard cemented layer you have to break through with a pick or jackhammer. Clay is soft enough to dig, but it behaves badly once you do — it won't drain, it won't hold amendments well without proper prep, and it moves with the seasons in a way caliche doesn't.
Is It Clay, Caliche, or Both? A Quick Way to Tell
You don't need a lab test to get a useful read on what you're dealing with. Two quick checks tell you most of what you need to know.
The dig test. Dig a hole about a foot deep and a foot wide. If a shovel or post-hole digger hits a layer so hard it feels like concrete, you've found caliche. If the shovel goes through easily but the soil comes out heavy, sticky, and moldable like modeling clay when wet — or breaks into hard, blocky clumps when dry — that's clay.
The percolation test. Fill that same hole with water and time how long it takes to drain. Healthy sandy loam in the East Valley infiltrates at roughly 2 inches per hour or better. Dense clay subsoil commonly drops below half an inch per hour, and in the worst spots we've tested around Queen Creek, water has still been sitting in the hole the next morning. If your hole is still full 12 hours later, you're dealing with clay, caliche, or both, and standard planting and irrigation assumptions don't apply until that's addressed.
A lot of Queen Creek lots have both layers stacked: a foot or two of heavy clay sitting on top of a caliche shelf further down. That combination is the worst case for drainage, because water that finally works its way through the clay just hits the caliche and stops again.
Clay Soil Yard Problems Queen Creek Homeowners Run Into Most
Once you know clay is under the surface, the pattern of complaints we hear from Queen Creek homeowners makes a lot more sense.
Standing water and soggy low spots. Water that should soak in within an hour sits for a day or more, especially in low corners of the yard or anywhere the grade was never quite right to begin with. Mosquitoes, mud, and a lawn that never quite dries out follow close behind.
Plants that drown instead of dry out. This is the one that catches homeowners off guard. Desert-adapted plants are built to handle drought, not standing water around their roots. When clay traps irrigation water in the root zone, roots suffocate and rot even though the plant is being watered on the same schedule that worked fine at the last house. A shrub that looks stressed and dying in the middle of summer is often getting too much retained water, not too little.
Cracked hardscape and heaving pavers. The shrink-swell cycle doesn't stop just because you poured concrete or set pavers on top of it. Patios crack, paver fields heave and shift, and block walls develop stress cracks as the clay underneath expands after monsoon rain and contracts again during the dry months. This shows up gradually, usually within a year or two of a build that skipped proper base prep.
Turf that holds water and mats down. "My new turf still gets soggy" is almost always a base problem, not a turf problem. Turf laid directly over native clay, or over a base that wasn't compacted and sloped correctly, sits on top of the same slow-draining layer that was causing problems before the turf went in. The grass looks great in photos and squishes underfoot for days after every watering cycle.
Irrigation systems fighting the soil. Drip irrigation designed for fast-draining desert soil overwaters clay almost by default, since the emitters keep running on a schedule built for a soil type that isn't actually there. The result is runoff, algae around emitter heads, and root rot in exactly the plants the irrigation was supposed to keep alive.
Fixing It: Grading, Amendment, and Drainage That Actually Works
There's no single product that fixes clay soil in one pass. The yards that stop having problems get three things done in the right order.
Grade first. Before anything else, the yard needs a real slope, roughly 2% (about a quarter-inch of drop per foot) away from the house and any low, walled-in corners, with a clear path for water to reach a legal discharge point. Clay makes this step non-negotiable, because a yard that traps water on a flat or backward grade will hold it far longer over clay than it would over sandy loam.
Amend the soil, don't just top-dress it. The University of Arizona Cooperative Extension's guidance on Southwestern soils is specific here: compost worked into the top 6 to 8 inches at roughly 20 to 40% by volume is what actually improves clay structure and lets roots and water move through it. Gypsum has a real role too, but only when a soil test shows elevated sodium — it's not a blanket fix, and dumping gypsum on soil that doesn't need it wastes money without changing the drainage. See the UA Cooperative Extension's guide to gypsum and calcium amendments for the testing thresholds.
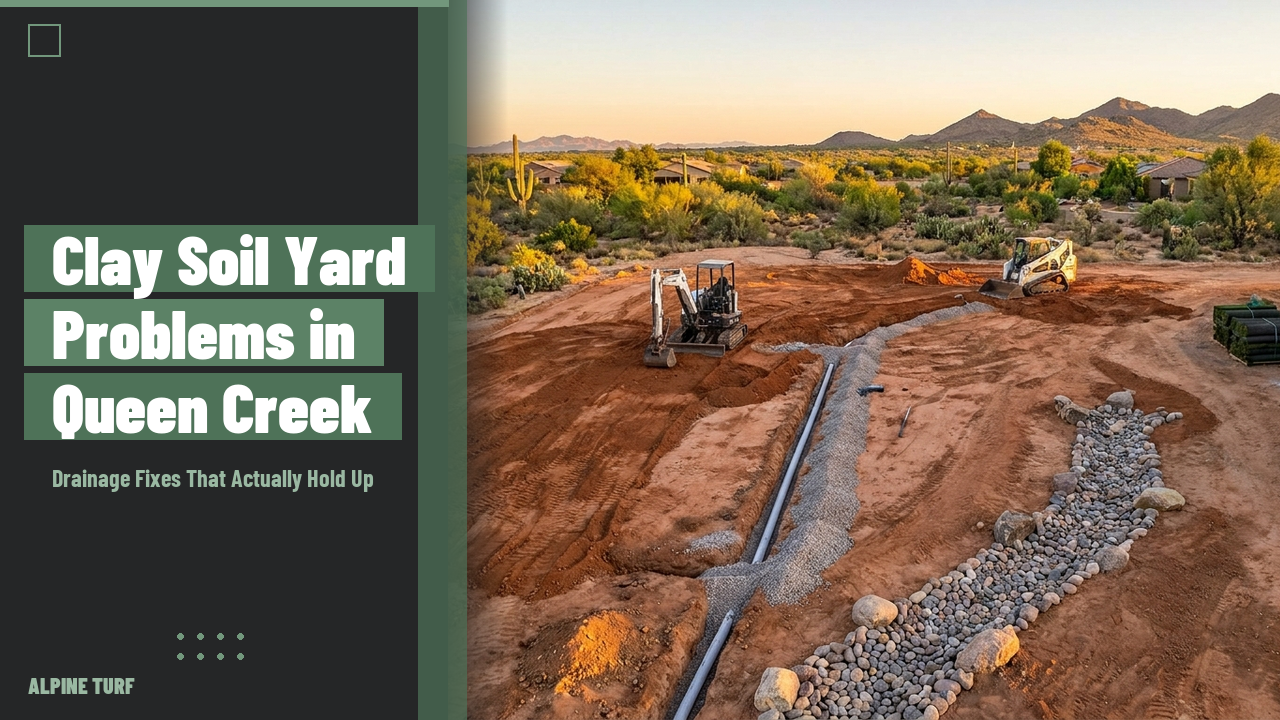
Add drainage where amendment alone isn't enough. Some low spots and chronically wet strips need more help than grading and amended soil can provide. A French drain (a gravel-filled trench with a perforated pipe) runs roughly $15 to $25 per linear foot in the East Valley and works well for a wet strip along a fence line or retaining wall. A dry well, an underground gravel-and-chamber pit that lets water percolate into the surrounding soil, runs $2,500 to $5,500 installed and is the right call when there's no legal above-ground discharge point. Clay soil is exactly the condition that can cause a dry well to fail its percolation test if it isn't sized generously enough for how slowly the surrounding soil actually drains, so this is not a spot to undersize the system to save money.
Turf, Pavers, and Plant Beds: Building On Clay Soil the Right Way
Whatever goes on top of clay soil needs a base built for it, not a base borrowed from a normal desert-soil install.
Turf needs a compacted, sloped base of crushed granite roughly 3 to 4 inches deep, separated from the native clay below by a permeable geotextile fabric. That fabric layer matters more on clay lots than sandy ones — it keeps the clay from migrating up into the base material over time and clogging the drainage the base is supposed to provide.
Pavers need the same base logic plus solid edge restraint, since the shrink-swell cycle in the clay underneath can shift a paver field over time if the base isn't compacted deep enough to isolate it from that movement. This is the difference between a patio that stays flat for a decade and one that starts heaving at the seams in year three.
Plant beds are the one place where more digging can actually make things worse. A common mistake is amending an individual planting hole and leaving the surrounding native clay untouched — that creates a "bathtub" effect where water pools inside the loose, amended hole instead of draining out into the surrounding soil, which is worse for root rot than not amending at all. The better approach is amending the entire bed area, not just individual holes, and grading the bed itself so it doesn't collect runoff from the rest of the yard.
This is also why we handle turf, pavers, plants, and irrigation as one project instead of separate trades. A yard that gets turf from one company and a patio from another usually ends up with two base specs and two grading assumptions that don't agree with each other, and clay soil punishes that mismatch faster than sandy soil does. Our guide to build order for pavers and turf covers how we sequence that work when a yard has both.
Where This Shows Up Most in Queen Creek
New-construction communities are where we see this most often, not older established lots. Hastings Farms, Encanterra, and Meridian all sit on ground with heavy clay subsoil under a thin cap of builder-graded topsoil, and the pattern is consistent: the yard looks fine through the first summer while the builder topsoil is still doing its job, then problems start surfacing in year two or three as that thin cap settles, erodes, or gets disturbed by the homeowner's own landscaping work.
It's not unique to any one subdivision. Any Queen Creek lot built in the last several years on native ground, rather than heavily imported fill, is a candidate for this. The tell is usually the timeline: a yard that drained fine at closing and started holding water eighteen months to three years later almost always has clay under a topsoil cap that has thinned out, not a sudden change in the soil itself.
Grading Rules and Permits in Queen Creek
The Town of Queen Creek's Design Standards & Procedures Manual governs grading and drainage work, and the core rule that applies to almost every backyard fix is the same one that applies across the East Valley: an approved grading and drainage plan needs to be followed on site, and work can't redirect stormwater onto a neighboring lot. That matters directly for clay-soil fixes, because regrading is usually step one, and regrading done without a plan is the most common way a DIY drainage project turns into a dispute with a neighbor.
Most residential-scale work — regrading a backyard, adding a French drain, amending soil, installing a dry well sized for a typical lot — falls under routine permitting rather than the town's full civil plan review process, which is reserved for larger developments and new subdivisions. Still, any grading or drainage work should follow the standards laid out in the Town of Queen Creek Design Standards & Procedures Manual, and dry wells specifically need a percolation test to confirm the surrounding soil can actually absorb the water before the town signs off.
Frequently asked questions
How do I know if my Queen Creek yard has clay soil?
Dig a hole about a foot deep. If the soil is easy to dig but comes out sticky and moldable when wet, or hard and blocky when dry, that's clay. Fill the hole with water and time the drain — healthy soil infiltrates around 2 inches per hour, while clay commonly drops below half an inch per hour and can still be full the next morning in the worst spots.
Is clay soil the same problem as caliche in the East Valley?
No, though a lot of Queen Creek lots have both. Caliche is a rock-hard cemented calcium-carbonate layer you have to break through with a pick. Clay is soft enough to dig but traps water and swells and shrinks with moisture, which causes different problems and needs different fixes than caliche does.
Can I just add gypsum to fix clay soil?
Only if a soil test shows high sodium. Gypsum works by displacing sodium in the soil, which helps clay particles clump into larger aggregates and open up drainage, but it doesn't do much for clay that's dense for structural reasons rather than a sodium problem. Compost worked into the top 6–8 inches is the more universal fix.
Why is my new turf still holding water on clay soil?
Almost always a base problem. Turf needs a compacted, sloped crushed-granite base 3–4 inches deep with a geotextile fabric layer separating it from the native clay. Skip that prep and the turf sits on top of the same slow-draining clay that was causing problems before, no matter how good the turf product is.
Do I need a permit to regrade my yard in Queen Creek?
Most residential regrading and drainage work falls under routine permitting rather than full civil plan review, but it still needs to follow the Town of Queen Creek's grading and drainage standards, and it can't redirect water onto a neighboring lot. Dry wells specifically require a percolation test before final sign-off.
Why do my plants keep dying even though I'm watering them?
On clay soil, overwatering symptoms and underwatering symptoms look almost identical from the outside — wilting, yellowing, stress. Clay traps irrigation water around the roots, which suffocates and rots them even on a normal watering schedule. The fix is amending the soil and adjusting irrigation for how slowly clay actually drains, not watering more.
Tired of fighting clay soil in your Queen Creek yard?
We handle soil amendment, grading, drainage, turf, pavers, and irrigation as one project across Queen Creek, San Tan Valley, Gilbert, Chandler, and Mesa. Free on-site soil and drainage assessment, no obligation.
Book your free soil assessment →